在这个前后端分离越来越流行的时代,跨域请求对于我们来说已经非常常见了。关于跨域,有N种类型,本文只专注于ajax请求跨域。
何为跨域请求
跨域问题来源于JavaScript的同源策略,即只有 协议+主机名+端口号 (如存在)相同,则允许相互访问。也就是说JavaScript只能访问和操作自己域下的资源,不能访问和操作其他域下的资源。跨域问题是针对JS和ajax的,html本身没有跨域问题,比如a标签、script标签、甚至form标签(可以直接跨域发送数据并接收数据)等。
几种常见跨域请求
跨域情形
请求代码:
1
2
3
4
5
6
7
8
9
10
11
12
| var requestApi = "http://localhost:8080/springmvc_hibernate_maven/";
$.ajax({
type:'get',
url:requestApi + "test/userInfo",
dataType:'json',
success:function(data){
console.log(data);
},
error:function(err){
console.log(err);
}
});
|
服务器端java代码
1
2
3
4
5
6
7
8
9
10
11
12
13
14
15
| @Controller
@RequestMapping("/test")
public class Test {
@ResponseBody
@RequestMapping(value = "/userInfo",method = RequestMethod.GET)
public String getUserInfo(HttpServletResponse httpServletResponse){
User user = new User();
user.setId(1);
user.setName("java");
user.setPassword("123456");
user.setLoginDate("2018-08-14");
System.out.println(JSON.toJSONString(user));
return JSON.toJSONString(user);
}
}
|
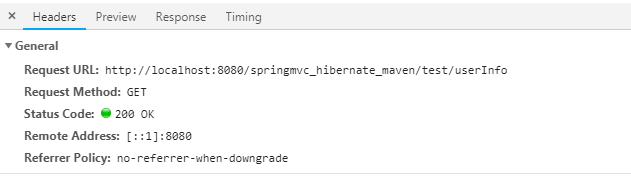
浏览器中访问(将html部署到nginx)结果:
![image]()
![image]()
虽然请求成功并且返回了状态码200,但是并没有返回内容,并且控制台还打印了报错信息
常见几种解决方案
jsonp方式处理(基本被淘汰了)
先看看json和jsonp数据格式的区别:
json格式
1
2
3
4
5
6
| {
"id":"1",
"name":"java",
"password":"123456",
"loginDate":"2018-08-14"
}
|
jsonp格式
1
2
3
4
5
6
| callback({
"id":"1",
"name":"java",
"password":"123456",
"loginDate":"2018-08-14"
})
|
jsonp比json外面有多了一层,callback()。
我们在请求的url后面拼接一个callback参数,用于返回jsonp格式数据
1
2
3
4
5
6
7
8
9
10
11
| $.ajax({
type:'get',
url:requestApi + "test/userInfo?callback=",
dataType:'jsonp',
success:function(data){
console.log(data);
},
error:function(err){
console.log(err);
}
})
|
服务器端处理:
1
2
3
4
5
6
7
8
9
10
11
12
13
14
15
16
| @Controller
@RequestMapping("/test")
public class Test {
@ResponseBody
@RequestMapping(value = "/userInfo",method = RequestMethod.GET)
public String getUserInfo(HttpServletRequest request){
String callback = request.getParameter("callback");
User user = new User();
user.setId(1);
user.setName("java");
user.setPassword("123456");
user.setLoginDate("2018-08-14");
System.out.println(JSON.toJSONString(user));
return callback+"(" + JSONObject.toJSONString(user) + ")";
}
}
|
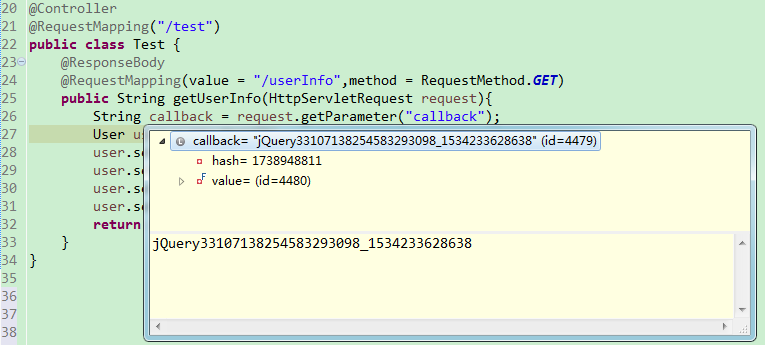
我们看一下后台获取的callback的值
![image]()
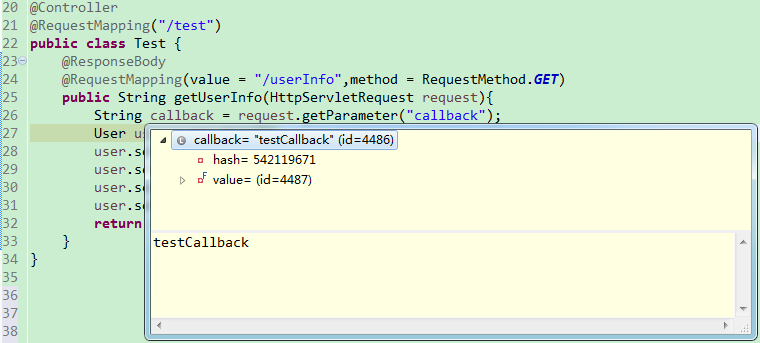
修改请求代码再看一下后台获取的callback的值
1
2
3
4
5
6
7
8
9
10
11
12
| $.ajax({
type:'get',
url:requestApi + "test/userInfo",
dataType:'jsonp',
jsonpCallback:'testCallback',
success:function(data){
console.log(data);
},
error:function(err){
console.log(err);
}
})
|
正是我们自定义的callback的值
![image]()
最后查看请求结果,控制台成功打印获取获取的数据
![image]()
需要注意的是jsonp是不支持post方式跨域请求,就算指定成POST方式,会自动转为GET方式;而后端如果设置成POST方式了,那就请求不了了。
另外可以使用jquer-jsonp插件实现跨域请求,服务器端无需做任何处理。
java服务器端添加允许跨域请求的响应头
ajax请求不用改,只需要添加响应头部Access-Control-Allow-Origin允许所有请求来源就可以了(所有服务器端处理都类似,对java不是很熟练,所以简单略过)
1
2
3
4
5
6
7
8
9
10
11
12
13
14
15
16
| @Controller
@RequestMapping("/test")
public class Test {
@ResponseBody
@RequestMapping(value = "/userInfo",method = RequestMethod.GET)
public String getUserInfo(HttpServletResponse httpServletResponse){
httpServletResponse.addHeader("Access-Control-Allow-Origin", "*");
User user = new User();
user.setId(1);
user.setName("java");
user.setPassword("123456");
user.setLoginDate("2018-08-14");
System.out.println(JSON.toJSONString(user));
return JSON.toJSONString(user);
}
}
|
结果:
![image]()
成功请求!
比jsonp更强大的CORS方式解决跨域
基于JSONP的实现原理,所以JSONP只能是“GET”请求,不能进行较为复杂的POST和其它请求,所以遇到那种情况,就得参考下面的CORS解决跨域了。
这里介绍的是java后端应该如何配置以解决问题
第一步:
1.非maven项目:获取依赖jar包下载 cors-filter-1.7.jar, java-property-utils-1.9.jar 这两个库文件放到lib目录下
2.mavne项目:添加如下依赖到pom.xml中
1
2
3
4
5
| <dependency>
<groupId>com.thetransactioncompany</groupId>
<artifactId>cors-filter</artifactId>
<version>2.6</version>
</dependency>
|
第二步:添加CORS配置到项目的Web.xml中(/WEB-INF/web.xml)
1
2
3
4
5
6
7
8
9
10
11
12
13
14
15
16
17
18
19
20
21
22
23
24
25
26
27
28
29
30
31
32
33
34
35
36
37
38
39
40
41
42
43
44
45
46
| <!-- 跨域配置 -->
<filter>
<!-- The CORS filter with parameters -->
<filter-name>CORS</filter-name>
<filter-class>com.thetransactioncompany.cors.CORSFilter</filter-class>
<!-- Note: All parameters are options, if omitted the CORS Filter will
fall back to the respective default values. -->
<init-param>
<param-name>cors.allowGenericHttpRequests</param-name>
<param-value>true</param-value>
</init-param>
<init-param>
<param-name>cors.allowOrigin</param-name>
<param-value>*</param-value>
</init-param>
<init-param>
<param-name>cors.allowSubdomains</param-name>
<param-value>false</param-value>
</init-param>
<init-param>
<param-name>cors.supportedMethods</param-name>
<param-value>GET, HEAD, POST,PUT,DELETE OPTIONS</param-value>
</init-param>
<init-param>
<param-name>cors.supportedHeaders</param-name>
<param-value>Accept, Origin, X-Requested-With, Content-Type, Last-Modified</param-value>
</init-param>
<init-param>
<param-name>cors.exposedHeaders</param-name>
<!--这里可以添加一些自己的暴露Headers -->
<param-value>X-Test-1, X-Test-2</param-value>
</init-param>
<init-param>
<param-name>cors.supportsCredentials</param-name>
<param-value>true</param-value>
</init-param>
<init-param>
<param-name>cors.maxAge</param-name>
<param-value>3600</param-value>
</init-param>
</filter>
<filter-mapping>
<!-- CORS Filter mapping -->
<filter-name>CORS</filter-name>
<url-pattern>/*</url-pattern>
</filter-mapping>
|
请注意,以上配置文件请放到web.xml的前面,作为第一个filter存在(可以有多个filter的)
除了上述配置,我们无需添加其他任何代码就可以尽情的使用GET,POST,PUT,DELETE等等这个方法了,是不是比jsonp强大多了
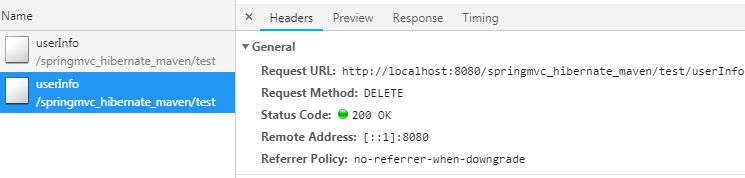
现在我们再来正常请求和处理请求试一下
1
2
3
4
5
6
7
8
9
10
11
| $.ajax({
type:'delete',
url:requestApi + "test/userInfo",
dataType:'json',
success:function(data){
console.log(data);
},
error:function(err,textStatus){
console.log("err",err);
}
})
|
1
2
3
4
5
6
7
8
9
10
11
12
13
14
| @Controller
@RequestMapping("/test")
public class Test {
@ResponseBody
@RequestMapping(value = "/userInfo",method = RequestMethod.DELETE)
public String getUserInfo(HttpServletRequest request,HttpServletResponse response){
User user = new User();
user.setId(1);
user.setName("java");
user.setPassword("123456");
user.setLoginDate("2018-08-14");
return JSONObject.toJSONString(user);
}
}
|
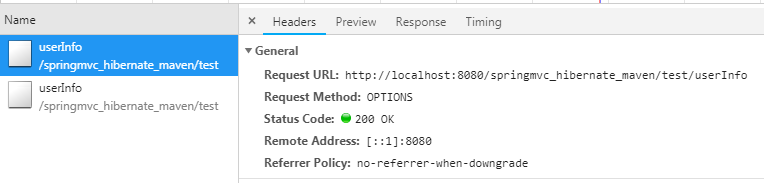
请求结果:可以看到有OPTIONS请求了
![image]()
![image]()
![image]()